

How To Copy An Html Page For Blog
This article is by Glenn Stok, a systems analyst with a Master's Degree in Computer Science and hundreds of published educational essays.
Blogger logo fair use license
You can make a professional business website and host it free with Google Blogger.
I've made several websites with Blogger, and I'll show you how to set parameters to make it work for hosting a regular website. I'll explain how it's done with Blogger's easy-to-use templates and a few changes to eliminate the blogging features.
I'll also show you how you can monetize Blogger with AdSense and other affiliate links, such as Amazon.
Make Sure You're Using the Latest Blogger
Blogger has come a long way over the years, with significant improvements. The older version didn't have the flexibility to tweak the layout, which is crucial for the ability to make a regular website.
If you started using Blogger a long time ago, you might have the old version. Everything is different now. To upgrade, go to your dashboard and look for the "Switch Now" button.
Everything I'll discuss, dealing with specific programming in this article, refers to the new blogger tool.
Where Is the Blogger Dashboard?
Older versions of Blogger used to have a dashboard where all the control options are located. That still exists, but they no longer call it a dashboard.
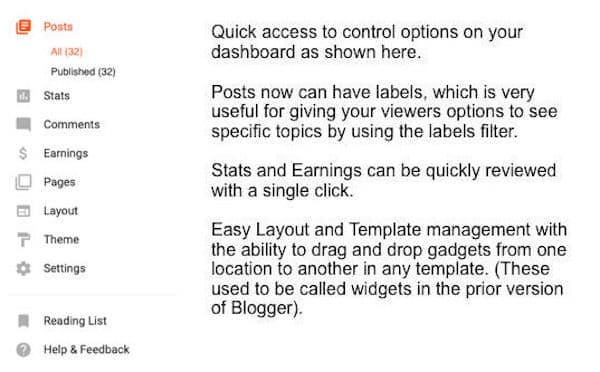
Blogger now includes all the control options in the main menu on the left-hand side (as shown below) for the administrator or author to manage their blogs.
Click the menu icon (≡) at the top left to open the main menu of options.
How to Activate Your Blogger Account
If you already have a Google account such as Gmail or AdSense, then you already have Blogger too. Log in to Blogger with your Google user and password.
You can create multiple blogs (websites) with the same Google account.
Let's Get Started
Here is a rundown of what you'll learn.
- I'll first explain what elements you should remove since you'll be using Blogger to create a regular non-blogging website.
- Then I'll go over items that you'll need for a thorough website.
- I'll also discuss how to fine-tune every detail, such as font selection, color schemes, and template manipulation with the Template Designer.
- I'll go over some Blogger facts worth knowing to put to your advantage.
- Finally, I'll show you how to monetize your site and view site statistics.
How to Remove the Time-Stamp on Posts
Remember, the focus of this article is to use Blogger to create a regular non-blogging website. So time-stamps on posts are probably not required, but that's your choice.
If you don't want your posts to be related to specific dates and times, then you should remove the time and date stamps. That is only required for blog posts. It's better to drop them with a regular web site.
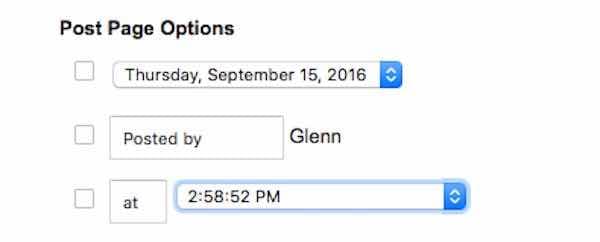
Click on "Layout" from the main menu (≡), edit the "Blog Post" gadget, and uncheck the options you don't want, such as the date and the time. See the image below.
You may also want to remove the "Posted by" and "Location" options. They also only apply to blogs.
How to Remove the Navbar
The Navbar is another item that you won't want on a regular website. It appears at the top of all pages, and has links to create a new post and to template designer, but this is available through your main menu (≡) anyway.
The Navbar also has a link to the next blog to bring traffic to others, and a signon link for you to log in. Why have a signon link on a website? You can always logon by going to blogger.com or if you are already logged into your Google account, you're good to go.
These are all the reasons to remove the Navbar. There is an option to remove it in the "Layout" settings. Just click "edit" on the Navbar gadget and select "off". Then save it.
How to Remove the Blog Archive Gadget
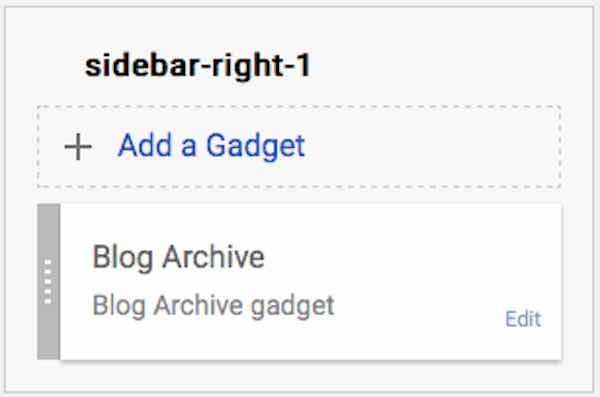
This gadget appears in the sidebar of new blogs by default, but it's only meaningful for a blog site. For a regular website, you probably won't want it.
You can remove it by selecting the layout option from your main menu (≡) and edit that gadget. Then click "remove" at the bottom of that gadget.
How to Remove the Blogger Profile Gadget
If you're using Blogger to create a regular website, not specifically for blogging, then it's not necessary to have a blogger profile. When you create a new blog site, the layout defaults to having the "Blogger Profile" gadget in the sidebar (unless you never created a profile).
If you don't want a reference to your profile then just edit that gadget and select the delete option to remove it. Your profile will remain intact in case you want to use it in any of your other blog sites.
There are several features most bloggers don't use, but you will want to take advantage of these for the creation of a regular website.
Too start with, you need to decide if you want to use stand-alone pages, or place content in posts. Posts are mainly used for blogs. Keep that in mind when setting up your website.
You can create pages the same as posts, except that they don't fall into the blog timeline as blog posts do.
You can also include images and videos in the pages with full control of layout within each page.
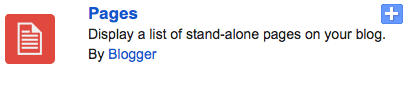
How to Use the Pages Gadget
You can use the "Pages Gadget" to provide links to each page in tabs on top or a vertical list on the sidebar.
When you put this in the header, it displays as tabs. When used in the sidebar, it creates a link list. You can drag and drop the gadget from one location on your layout to another to see how it looks. You can also have more than one if necessary.
IMPORTANT: You will want to come back to this gadget when you add new pages to your website. You will see each page title in this gadget. You need to put a checkmark on each one that you want to include in the tabs or listing.
How to Use Link Lists or Tabs for Navigation
I mentioned the "Pages Gadget" earlier to create a list of links for your pages, but I need to explain something important about its placement, so you have the best results.
In some cases, you might want tabs. For other things, a list may be better. You can use tabs to place links to relevant pages on your site. Each template displays the tabs in a different format, so you may want to experiment with how they look.
For cosmetic reasons, keep your tabs limited to one row. They should only provide a quick view of the most important pages. Don't litter it with a link-list, which is better when placed in a vertical column in the sidebar.
You can drag and drop the "Pages Gadget" to the sidebar and back to the header to see how it looks in each position without losing the links you already placed on the list. When the gadget is in the header, it displays as tabs. When it's in the sidebar, it automatically displays as a vertical link list.
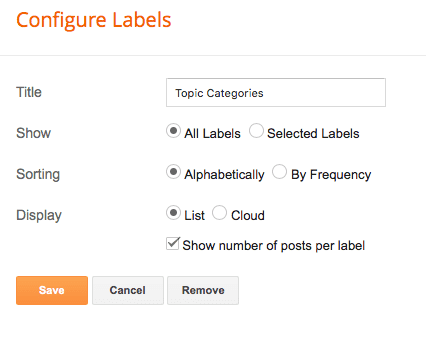
How to Use Labels to Create a Reference to Posts
Adding labels to your posts is a way to create a reference to the content. That can only be done for posts, not for pages. You add one or more labels to each post.
The beauty of this feature is with the "Labels" gadget. Include that gadget in the sidebar, and it automatically lists all the existing labels that you had used. That is actually an active link list.
You can program the way you want your labels to appear, as shown below.
When a visitor clicks on any label in the list, all the posts with that label come up.
Try it to get to know what it can do for you. That's the best way to learn how useful this feature is.
How to Include Text in Your Layout With the Text Gadget
You might have reasons to add text directly to your layout. Just add the text gadget anywhere you want to include some text.

How to Include Images
Including images on your posts and pages is easy. You just open your directory list in another window and drag and drop an image file. Then drag it around the text you have on that page to position it where you want.
If you prefer, you can upload an image to a page (or post) by clicking the image icon in the options at the top. It's the second from the left in the image below.

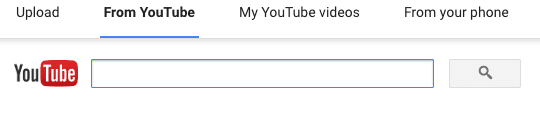
How to Include Videos
When you're editing a post or a page, you can click the video icon (third from the left in the image above) and select the method you want to use from the top row.
For example, if you want to insert a YouTube video, select "From YouTube" and enter the URL of the video.
By default, all posts have a comment box at the bottom for visitors to leave comments. You can hide that globally under "Settings > Posts, Comments and Sharing" and change "Comment Location" to "Hide".
If you do want to accept comments, you should set the options in this menu to be sure you are moderating new comments to avoid spam.
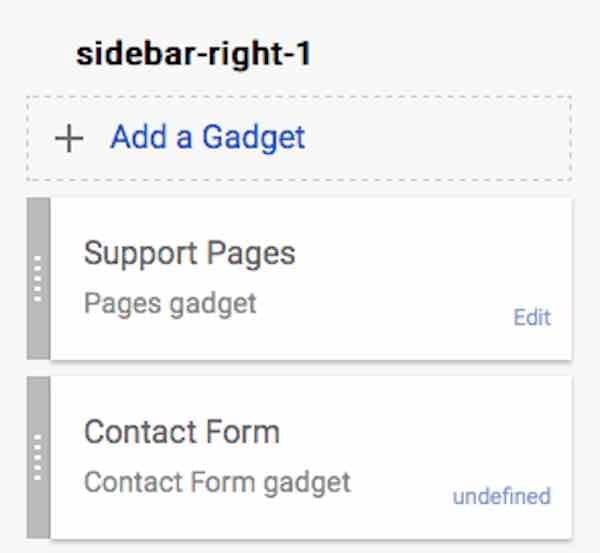
You can use the "Contact Form" gadget to include a form in your layout, as shown below.
That gives people the ability to send you a message via email without knowing your email address.
Blogger will send the message to the email address registered with your account.
How to Include Your Copyright Notice
I always like to include a copyright notice. There is a field for that, and Blogger places it in the footer for you. Edit the footer in your layout and fill in the copyright field.
Search Engine Optimization Considerations
You should create a good page description, for SEO purposes, to improve viewer traffic from organic search results. This information goes in the meta description tag, but you don't need to know HTML.
You can enter a description in the "Search Description" field. That option is on the right-hand column when editing any page. It only works for pages, not for posts.
The description you enter will appear in the Search Engine Results Pages (SERPs) when people search for information that you have on your site. The description should be no more than 160 characters. Otherwise, Google may truncate it.
In some cases, Google may choose a section of text from the content if that matches the search query better.
As I mentioned, this only works for pages, not blog posts. All the posts simply use one standard site description that you specify in "Settings > Search preferences".
Note that this field is different from the description you type in the "Settings > Basic" section. That "basic" description appears under your title in your banner.
How to Use the Blogger Template Designer
If you want to fine-tune things, which I recommend you get used to doing, you can go to the Template Designer and change backgrounds, layouts, fonts, colors, and so on.
A useful feature is that you can quickly switch from one template to another to see how your finished product looks with other templates.
From your main menu (≡), click on "Theme" and then click "Customize" under the sample image. That opens the Template Designer.
Under advanced settings in the designer, you can change text fonts and text sizes of each part of the site individually.
For example, I made the text size larger for the titles of gadgets. That made the titles of the right sidebar links larger.
You have to experiment. The advanced section of the designer shows you which section you are changing as you click on various options. Nothing affects the live site unless (and until) you click "Apply to Blog" in the top right corner of the template designer.
One-Minute Review of the Template Designer
About Blogger's Sitemap and Search Discovery
An interesting fact worth knowing. I noticed that the sitemap of each blog only contains the posts, not the pages. Search engines will know about all the posts from the sitemap.
However, the only way search bots would discover the content that you created as pages is by following links from other posts, or link lists and tabs created with the Pages Gadget.
Therefore, make sure to keep this in mind when creating a site.
Consider the URL When Creating Posts or Pages
When you create a page or a post, the URL is generated automatically from the title. However, if you later change the title, the URL remains unchanged. That is done purposely so that any incoming links don't get broken.
For this reason, you might want to think about the URL when creating posts or pages. Why? I always like to be sure the URL is general enough so that it makes sense in the future if I drastically change the title. That's why.
How to Set the URL of Posts
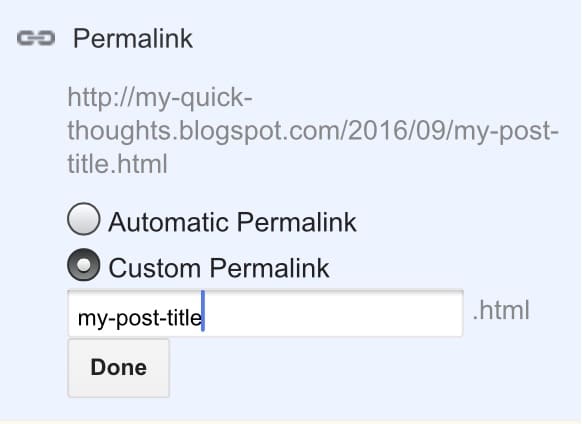
You can override the URL when you create a post by selecting the Permalink option under "Post Settings" and change it to "Custom Permalink" as shown below. Then type in the URL you wish to use.
How to Set the URL of Pages
Pages don't have the option to override the URL. However, I discovered a trick. You can publish the page with a temporary title that you want for the URL, then go back, change the title, and save it. The original generated URL will remain.
Make Certain to Keep a Static Home Page
Blogger always displays the newest blog post on the home page. That is because it was designed for blogging. I like to have a home page with a consistent welcome message, and you probably will want this consistency too.
I found a way to maintain the desired fixed content there. It's not automatic. You'll need to do a little work each time you add another post.
Whenever you add content with a new post, view your blog, and click to the home page. You'll see the latest post you just made. You'll need to remember to copy and paste the correct content into a new post each time you do this. Then you can delete the prior home content post.
When you do this, you can copy and paste the same title, no problem. Blogger will append an extra string to the URL, but that won't matter. No one even sees it. Only the site's top domain is shown in the browser when on the home page.
How to Make Money With Blogger
How to Monetize Blogger With AdSense
There are two ways to use AdSense with Blogger. Both methods are with gadgets.
The easy way is to include an "AdSense Gadget" anywhere you want to place an ad. You can also use an HTML Gadget, but then you need to go to your AdSense account and copy the generated HTML code.
Either method requires that you have been approved to use AdSense with Blogger. To get started, go to the overview page for one of your blogs and click on "Earnings".
If you don't see a "Sign up for AdSense" button, then you need to wait until your "blog" qualifies for AdSense. You may need to add more posts or pages and then wait a few days or more. Keep checking it. It took only three days for me, but some people told me they waited much longer.
When you see the "sign up" button, click on it, and follow the steps. Be careful not to ask to create a new AdSense account if you already have one, and you want to use it for your Blogger site. You can use a single AdSense account on multiple websites, unless you opened one specific to a particular site.
If you are using the authorized sites feature, you'll need to add your Blogger URL to your "owned sites" list in your AdSense account before you can continue. Then come back to Blogger and go to the Earnings page again.
Now you can click the button that says "Create or use another account" and follow the steps to associate your existing AdSense account to your Blogger account. If you did it right, you should see:
Congratulations!
The AdSense widget has been added to your blog template.
You can see your earnings in your Google AdSense reports. Go to "Performance Reports" and click on "Common reports > Sites" for a listing of all sites that had traffic. It shows you the views, impressions, clicks, and earnings.
How to Monetize Blogger With Amazon Affiliate Links
If you have an active Amazon Associates account, you can add Amazon products to your posts or pages with either of three methods: text links, image display, or image with text.
For either method, just go to that product page while logged into your associate's account. You will see the Amazon Associates SiteStripe on top of the page, as shown below. Select the type of link you want to use.

Image Links:
If you select an image or image with text, Amazon will generate the HTML for you to place on your site. The on Blogger add the HTML/JavaScript gadget to the layout where you want the image to appear.
Copy the HTML code that was generated and paste it into the gadget. Then save it.
Text Links:
If you want to have a text link that you assign to some anchor text for the product, click "Text" next to "Get Link" on the Amazon SiteStripe and copy the link address that it gives you.
Then in Blogger, highlight the anchor text, click the "Link" option (see below), and paste the saved link address.
How to Use Google Analytics for Blogger Data Statistics
Google Analytics can be linked to your Blogger account so you can track your visitor statistics.
First, you need to go to your Analytics Account and create a new Property ID to assign to your blog. You need to create a property for each blog in case you have more than one, so you can track them individually.
After creating a property for your blog, go to "Settings > Other" from your main menu (≡). The last item on that page is a field for your Analytics Web Property ID.
Note: Google Analytics is not supported on classic templates such as the "Simple" templates. I confirmed that it does work with "Dynamic Views" and "Picture Window" templates, including all mobile templates.
Blogger Stats Vs. Google Analytics
Blogger has its own Stats page that shows some useful information. However, Google Analytics, which I just discussed, gives you a lot more detailed and valuable information about how your audience is viewing your blogs.
If you just want to use Blogger Stats, select "Stats" from your main menu (≡) and select the period: Now, Last 24 hours, Last 7 days, etc. Then scroll down to view the various reports.
People Also Ask
Can we use Blogger to create websites for other people?
You need to be logged in under our own Google account, so therefore you can only create websites under your own account with Blogger.
If someone else wants you to create a website for them using their Blogger account, then they will need to agree with letting you log into their Google account. Then you can create and manage Blogger for them.
Is there a way to add in a calendar to a page?
To add a calendar to Blogger, you need to use a third-party calendar widget. Then you can install it using the HTML/Javascript gadget in the layout.
- Do a Google search to find a calendar template widget that meets your needs.
- Then in your Blogger select "Layout" from the main menu (≡).
- Click on "Add a gadget."
- Add the HTML/Javascript gadget to the location desired in your layout.
- Paste the calendar code in the HTML field of the gadget.
- Click Save.
- Then also click to save the arrangement.
Can I move existing posts to pages without losing the views?
You can't save the history of views if you want to create a page from content that was once a post.
Pages and Posts use different internal configurations. You can't move one to the other. However, you can create a new page, and then copy and paste the content from the post. Then delete the post. Unfortunately, you will lose the stats on the original post.
Additional Help Topics
What you learned from me today is all you need to know to create an outstanding website with Blogger that will make you feel proud.
There is much more to Blogger than I covered here. You can learn more from the help pages at Blogger.GoogleBlog.com, including the latest tips. I recommend spending time reviewing the tutorials available there.
As you get to know more of its features, you'll find yourself becoming creative with clever web designs. Enjoy the flexibility of Blogger.
Questions & Answers
Question: How do you make a Blogger site mobile and tablet responsive?
Answer: Blogger will detect the screen size and display it properly on mobile, tablet, or desktop. You don't need to do anything because it's automatic.
Question: How can I add a "subscriber button" on my blogger site?
Answer: Blogger has two methods that you can use to easily install a subscriber button.
1. If you want to allow people to follow by Email:
Go to your Layout screen and click "Add a Gadget" where you want to place the "follow" option. Then scroll down to "Follow by Email" and click the plus button (+) to add the gadget. Change the title if you don't want the default and click "save."
2. If you want a Subscribe option:
Go to your Layout screen and click "Add a Gadget" where you want to place the subscribe option. Then scroll down to "Subscription Links" and click the plus button (+) to add that gadget.
Question: How do I embed a nofollow link in blogger and how to find the "exact location" in the HTML code to insert rel="no-follow"?
Answer: The nofollow tag goes on a link to tell search engines not to follow that link. You can add the nofollow tag to an outbound link on a blogger post or page as follows:
1. Select "Posts" or "Pages" from the left column options, depending on which type of content you want to work on.
2. Click "edit" on the content you want to change.
3. On top you will see two options tabs: Compose and HTML.
4. Click HTML so you can edit the raw source code.
5. Look for the link you want to make nofollow.
6. Add rel="nofollow" tag within the < a href=... > parameter. The location within the < a > does not matter. You can place it before or after the href tag.
7. Save the content.
Question: How can I remove the link at the bottom of blogger saying: "Subscribe to: Posts (Atom)"?
Answer: The "Subscribe to: Posts (Atom)" is a link that viewers can use to subscribe to your blogger site so they get a feed of your posts.
Atom is similar to RSS feeds. They both provide new content of websites that are followed so that updates can be viewed in a feed reader without having to periodically visit the site to find out if anything new was posted.
If you don't want to provide this option to your readers, or if you feel the display of that option interferes with the looks of your layout, you can remove it by following these steps as of the 2018 version of Blogger:
1. Go to the "Theme" settings.
2. Click "Edit HTML"
3. Place the curser within the code box.
4. Find (CTRL-F) the following line of code and remove it:
< b:include name='feedLinks' >
5. Click on the "Save Theme" tab button.
6. Click the "Back" tab button to return from the editor.
© 2016 Glenn Stok
ephonehub on May 23, 2020:
Thank you for the wonderful tips! I have been wondering how the heck do I do this kind of grouping and luckily your guide is right on the spot!
Amanda Crews on April 18, 2020:
Kudos to you, Glenn Stok!! This is such an informative article.
Thank you for sharing your expertise on this matter!!!!!
Glenn Stok (author) from Long Island, NY on July 03, 2019:
Steve - I read your prior comment again because you said you wanted to change the admin email. But I understand now that you are testing the invite feature by using another email.
I think it seems to fail because you probably still are logged into your admin email. Make sure you have logged out, cleared your cache, and removed cookies that make Google recognize you. Then after you've done that, log in with the other (invited) email and the credentials of that email should show up.
Steve on July 02, 2019:
Hi Glenn,
Thank you for your answer before. However, given the fact that when I invite other authors it is not working, what can I do to rectify that?
Thank you
Glenn Stok (author) from Long Island, NY on July 02, 2019:
Steve - You're the primary author of your Blogger Account. The author invite is only used for accepting other authors. To change your admin contact info, you need to log into your Google account, click on Personal Info, and change your email under "Contact Info" there.
Steve on July 02, 2019:
Hi Glenn.
Great article by the way.
Can you help me with something?
I have set up my Blogger site and want to change the admin email.
I went to settings and invited myself via another email I own (a Gmail account), and when the invitation arrives, I accept it and all seems well. But when I look at the page in Blogger, nothing has changed and when I refresh the page, the invite email details that were there before disappear.
Do you know why this may be happening. Thank you.
Glenn Stok (author) from Long Island, NY on June 13, 2019:
Savita - Pages and Posts have completely different configurations in the way they are structured. They cannot he changed from one to the other. The only way is to copy the text from the post and paste it to a new page. There is no way to save the history of views. This is why planning ahead is so important.
Savita on June 13, 2019:
Hi,
Thank you for a very educative post on Google Blogger. I am a recent user and have made the mistake of creating a post called About Me, which I now want to move to Pages. The problem is that as a post, About Me already has 57 views. Is there any way I can move the posts to Pages and not lose the views? Thanks!
Glenn Stok (author) from Long Island, NY on March 27, 2019:
Hauuwa - There are many blogger templates available that other people make. Some are free for download and others are for sale. You can find them with a simple Google search for "blogger templates".
Hauuwa on March 27, 2019:
Hi, thanks for this. I want to make independent pages on my blogger such that I will be able to make posts to the pages as well just like a typical blogger home page and as obtained on Wordpress, where a page has a template of its own but it seems I can only just do a simple information page . How can I design my pages to have beautiful templates and not just the plain one blogger offers?
Chima on January 10, 2019:
This is a very useful guide. I just went through it and were able to convert my blogger blog to a website. I appreciate you.
Dip Sarkar on May 05, 2018:
Finally! Something that explains it in terms I can understand.
I'm so grateful to have seen this post! I am so happy that you covered this topic.The best explanation thus far!!!!!! So easy to understand!
Thanks for sharing!
McKenna Meyers on October 14, 2016:
Thanks to you, Glenn, I started a website using Blogger. I couldn't have done it without these clear step-by-step directions. Thanks so much!
How To Copy An Html Page For Blog
Source: https://turbofuture.com/internet/blogger-for-web-hosting
Posted by: dixongionit.blogspot.com
0 Response to "How To Copy An Html Page For Blog"
Post a Comment